Sunday, 20 March 2011

glass casting results

So I managed to restrain myself from turning the kiln on for 6 days!!! Are you as impressed as I am?! I'll admit I was going to put it on sooner but on Tues I bumped into Sue Chalk and she said she'd recommend leaving the molds to dry out for about a wk so I sensibly listened to her advice.


After 30hrs in the kiln I broke open the molds and this is what I found. Some of the edges were a little sharp, especially on the lagoon green shell which was the one that had got buried in the plaster, so I had to start grinding off the edges.


I love the level of detail that remains in the glass after its cast.


Last week I experiemented with fusing the lead crystal glass into flat shapes and was quite pleased with the results. I'm now wondering whether to use shapes like this as a base to put my sculptures on top of. What do you think?


What colour combinations/contrasts do you like best? I think I prefer the green shell on the bluey base, do you agree? mmm decisions decisions.....and what shall I get making next?....oooh the possibilities are endless.


glass casting 1

Back in October I went on a glass casting workshop with Sue Chalk and have finally started to experiment with it at home now. All it took for me to get going was discovering that the gorgeous lead crystal glass I needed was on sale at Glass from The Past in Billericay and I was away :o)

Last weekend while I sat on a craft stall at Hylands House I spent several hours making mini sculptures. Using plasticine, shells, a pencil and a craft knife I began to create the 3d forms I wanted to cast in glass.


Now anyone who knows me won't be surprised to hear that I was far too keen to see how they would come out to wait for too long to make the molds. By sunday evening my kitchen looked a bit of a mess with plastic pots, a jug, bags of glass, newspaper, plaster, weighing scales and various other bits n bobs cluttering the worksurfaces.

Some of the castings worked perfectly....
...but the one with the air bubbles didn't look quite so good....
 
...the plasticine had come unstuck from the base and moved inside the mold but armed with a handy craft knife to dig the plasticine out happiness was restored :o)


By the time I went to bed on Sunday evening the glass was secured in the molds ready to go in the kiln

All that was needed was patience in waiting for the molds to dry out before I could turn the kiln on....and that's not something I'm too good at when something this new and exciting is concerned. How long will I be able to wait before I programme the kiln?

Thursday, 17 February 2011

Needlecraft thats just my cup of tea!

Having watched Kirstie's Homemade Home in the Autumn last year I fell in love with these gorgeous cushions by Emily Peacock. I guess like most people I'd never seen any kind of needlework thats so modern like these designs. I'd had a traditional image of landscape picture or samplers. As a child I'd made many a cross stitch in school holidays and bought my mum a couple of kits a few years back for a Christmas present. She's not quite finished them but is quicker than my sister who's still trying to finish one she started around 15yrs ago!!!

I've just bought myself a kit for 'HUG' and am hoping it doesn't take me as long to do as my sister's 'country companions' kit.

Designers like Emily Peacock and Granny Knits have become firm favourites for me. I'm following them with enthusiasm on Facebook and came across this link on Emily Peacock's page, which is all about contemporary needlepoint. Take a look if you are as keen on this style of work as me and you won't be disappointed. 


Wednesday, 16 February 2011

My kitchen door design

For a while now I've wanted to learn how to lead glass so that I can create a glass design for my kitchen/hallway door. In January I went on a leading day workshop and have now finished designing my 1st piece. I'm slightly worried it could be a challenge too far but maybe if I knew what was coming I'd not set myself such a challenge and therefore wouldn't get better so quickly. I remember doing the same when I started glass fusing and regretted cutting sharp curves in opaque glass as I couldn't see what I was doing but I persevered and Mum eventually got her bowl (but not quite on time for her birthday! oops)
.


I've decided to combine fusing and leading in this piece (see what I mean about doing something challenging for a 1st piece!) and will fuse the 'eyes' and the head piece of the peacock. This way I should be able to get a bit more detail in the work and create some added interest. Before doing too much more cutting out I need to experiment with the fusing just incase the pieces need adjusting to fit the pattern. I don't want to have to recut lots of pieces because the fused elements 'grow' in the kiln as the glass melts.

Watch this space to see the trials and tribulations of making the peacock and share my surprises along the way too...

Sunday, 23 January 2011

The outcomes of the baby feet/hand casting

Part 2 of casting a baby's foot for posterity!

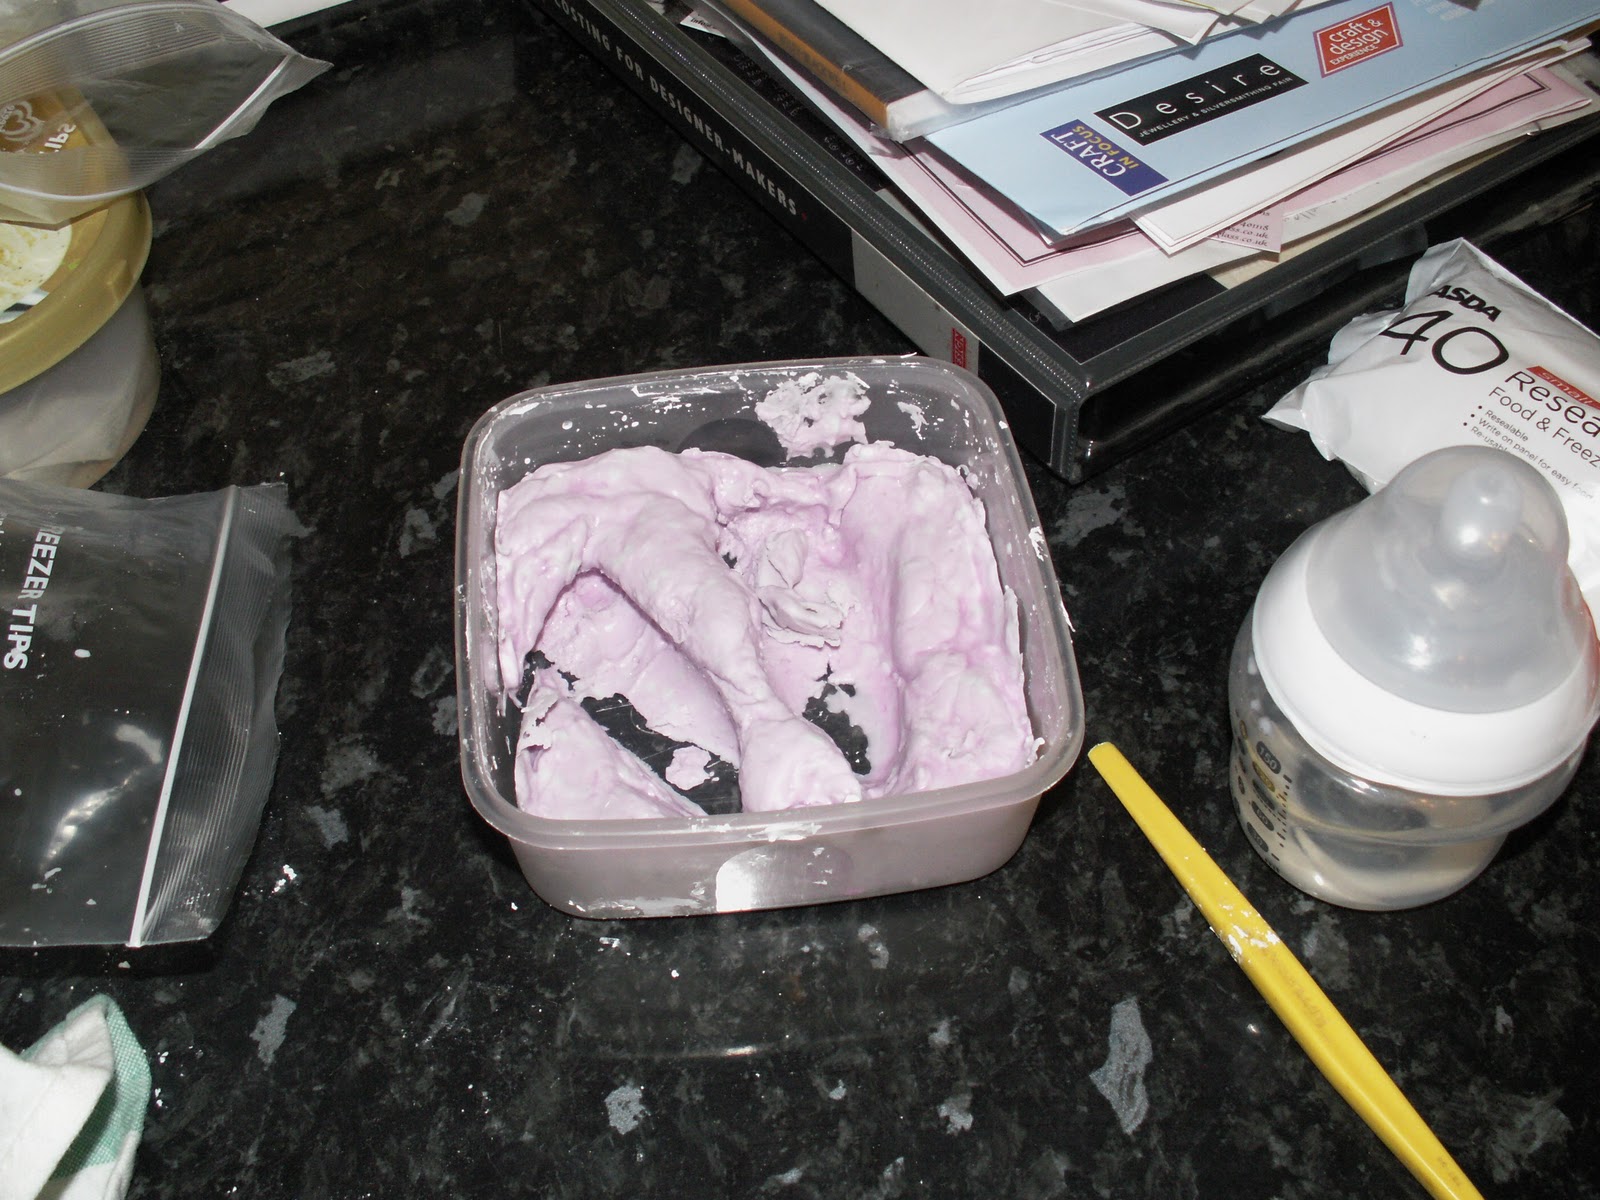
These are the outcomes of our 1st try at casting a baby's feet and hand. As you peel away the rubbery alginate mixture its amazing just how much detail you start to see on the plater cast inside. With the pink from the mix slightly dying the plaster it looks spookily real. We were quite relieved to see the pink fade though as the plaster dried out!

A foot starting to emerge from the the mold. Its looking all wrinkly like the foots been in a bath for too long!

We were impressed with our creations and surprised ourselves at how amazingly real they looked. You can also see which ones have been exposed to air for longer as the pink becomes less bright.

We needn't have worried about the fist after all. It came out the best of all the casts.

An adorable little foot...ahhhhh.
So glas we didn't buy one of those kits from the shops and tried something a little differernt instead. The risk definitely paid off :o)

Wednesday, 19 January 2011

copying other peoples designs is wrong

This evening I dropped into Twitter to discover lots of people I follow retweeting posts from a designer with the user name @SheDraws  Today a friend of hers discovered that Claire's Accessories have plagerised a necklace design and have been selling it in their shops. If you follow the link below you will be able to read @SheDraws blog post about this and see examples of the 2 necklaces. They are scarily similar and clearly show no morals on the part of Claire's or even any attempt to make slight design changes.

http://drawglueglittermake.blogspot.com/2011/01/claires-accessories-have-copied-me.html

Things like this make me so angry and are just so wrong. Designers need the credit they deserve for their hard work and not to be treated like this. If you feel strongly about this issue to please pass it on and avoid shopping in Claire's. Go to a real crafter for a quality piece of jewellery instead.

Tuesday, 18 January 2011

Making a cast baby foot

Its become popular recently for new parents to buy kits to imprint their baby's hand or foot print. My sister had a baby in October and wanted to create a mini hand and foot to remember just how small Adam was when he was first born but being related to arty old me we decided to try for something a little different.

Armed with dental alginate and you tube tutorials we decided to cast both feet and a fist too.

Attempt no1 to imprint the feet was a disaster so thats when we looked up you tube!

I poured the quick setting alginate into a bag and and we then put Adam's foot into it and tried to keep him still until it set. It was soooo much easier when he fell asleep and then didn't move at all!!!

Looking into the cast.

As the alginate dried it turned pink. We poured plaster into the molds and then left them overnight to set. At this point my sister took the molds home and I was left wondering what these mini feet would look like. We both thought the fist mold hadn't worked as well as the feet had so I waited in anticipation to hear how well our efforts had worked........


Monday, 17 January 2011

Glass Casting

Its been a while since I regularly blogged (life kind of caught up with me and time for blogging disappeared I'm afraid) and I've just realised that one of my last posts was about the glass casting workshop. So I told you all about the workshop and never ended up showing you how my pieces came out.

The cast glass still inside its mold.

Breaking open the molds

My finished pieces made from lead crystal. I had no idea that this level of detail would be seen within the glass so was really pleased with my mini sculptures.

Sunday, 16 January 2011

Leaded Stained Glass Workshop

Yesterday I went on a leaded stained glass workshop which is a glass technique I've wanted to try for a while now. Having copperfoiled for 2years now I am more than ready to work with something new in the evening class ......and I've got a large project in mind for my house too.

The workshop started with choosing a design so I opted for this one which I decided to make Christmasy ready to come out each year and to replace some of the more spring/summer copper foiled designs I've already got hanging in my windows.

The morning session was fairly straight forward as I'm used to cutting glass but I was ready and waiting for the challenge of the afternoon when the lead came out of the cupboard! We all learnt to stretch the lead and how to cut it with 3 different tools and then it was time to put our learning into practice. Having watched my Tue eve classmates struggle with leading I thought this was going to be very very difficult, I was therefore surprised at how quickly a design could be leaded together. Ok quickly is a slight exaggeration but I was expecting it to be much longer and much more technical....although I know the designs we had chosen from were on the simpler side of challenging. I'm sure it won't be long before I'm back in the Tues class trying to lead a design and finding out what my classmates have been experiencing and will be quickly eating my own words!!!

Now for the challenge of designing my own work for my house


Friday, 15 October 2010

Glass Casting Workshop

My journey with glass continued into the world of glass casting this week. Its a whole new area to learn about and one I've been wanting to try for a while now. I very nearly signed up for a masterclass with Keith Cummings at the International Glass Festival this year but then decided I wanted to try it on a smaller (and cheaper!) scale first.

This week I started a 3 week course at Glass from the Past with Sue Chalk. She is an excellent, experienced glass artist who we've spent years asking, no actually begging, to teach us all how to cast glass. By day Sue is a science technician at the same school as me but this masks her amazing knowledge and skill for glass. For the past 13yrs Sue has been exploring glass, drawn to the play of colour and light and is intrigued by the plastic and manipulative qualities of glass. She is currently casting lead crystal and many of these pieces are on display at Glass from the Past and have a magical luminous quality to them. In 2006 she received the Worshipful Company of Painter-Stainers' award for creative glass and has also exhibited at the Victoria & Albert Museum in London. Now I'm pretty sure not many people at school know that!


So workshop 1 was all about making an item out of chavant plasticine ready to cast it's negative next week. I became completely absorbed by making my item, a mini conch shell but before I knew it the time was over and I came away with some chavant to try and make another item to cast next week. Who knows if I'll have time to do my homework though as I'm off on another workshop this weekend to learn how to make silver art clay. Happy times in workshops this week :o)